- metadata:
- source: https://www.home-assistant.io/common-tasks/supervised/#home-assistant-via-the-command-line
## Update
Best practice for updating a Home Assistant installation:
1. Backup your installation, using the backup functionality Home Assistant offers.
2. Check the release notes for breaking changes on [Home Assistant release notes](https://www.home-assistant.io/blog/categories/core/). Be sure to check all release notes between the version you are running and the one you are upgrading to. Use the search function in your browser (`CTRL + f` / `CMD + f`) and search for **Breaking Changes**.
3. Select “Create backup before updating” in case you encounter an issue that requires a rollback.
4. Update Home Assistant.
5. Review persistent notifications and log to see if there are any issues with your configuration that need to be addressed.
To update Home Assistant Core when you run Home Assistant Supervised you have 2 options.
> [!Using the UI]
> 1. Open your Home Assistant UI
> 2. Navigate to the Settings panel
> 3. On the top you will be presented with an update notification
>
> _If you do not see that notification you can click the overflow menu in the top right and select “Check for updates”._
> [!Using the CLI]
> ```bash
> ha core update --backup
> ```
>
> _The_ `--backup` _flag here ensures that you have a partial backup of your current setup incase you need to downgrade._
## Run a specific version
You can use the CLI to upgrade to a specific version (`2023.4.6` in this example), to downgrade your installation you should do a partial restore of a [backup/#backups) instead.
_The_ `--backup` _flag here ensures that you have a partial backup of your current setup incase you need to downgrade._
## [Run a beta version](https://www.home-assistant.io/common-tasks/supervised/#run-a-beta-version)
## [Run a development version](https://www.home-assistant.io/common-tasks/supervised/#run-a-development-version)
## [Configuration check](https://www.home-assistant.io/common-tasks/supervised/#configuration-check)
## Configuring access to files
Your Home Assistant Operating server includes two repositories by default: The official core add-on repository, and the community add-on repository. All of the add-ons mentioned here can be installed by navigating to the add-on store using [Settings > Add-ons > Add-on Store](https://my.home-assistant.io/redirect/supervisor_store) in the UI.
One of the first things to take care of after installing Home Assistant OS is to provide yourself access to files. There are several add-ons commonly used for this, and most users employ a mix of various add-ons. Default directories on the host are mapped to the add-ons so that they can be accessed by the services any particular add-on might provide. On the host system these directories exist on the `/data` partition at `/mnt/data/supervisor/`.
Using any of the add-ons listed below,the following directories are made available for access:
- `addons`
- `backup`
- `config`
- `media`
- `share`
- `ssl`
---
### Installing and using the Samba add-on
The Samba add-on creates smb shares which can be accessed from another computer. You can also edit files using the editor of your preference from your client computer. This add-on can be installed from the add-on store’s official repository.
To configure the Samba add-on, you only need to set a user and password of your choice on the configuration page, save, and then start the add-on. The add-on will not start without setting a password!
To connect to the Samba server from another device, you will use the IP address or hostname of your server. Either of these can be found on the [Settings > System > Network](https://my.home-assistant.io/redirect/network) page of your UI.
For connecting from Windows 10, you can enter the IP address or hostname in File Explorer’s address bar with two backslashes, as shown in the example screenshot.
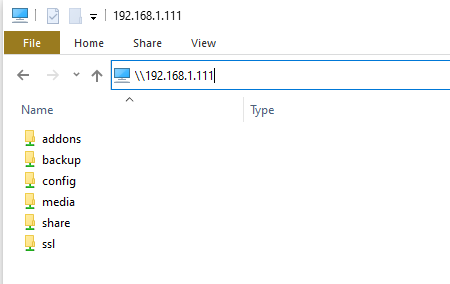
You should then be prompted for the credentials you entered in the Samba add-on configuration. You also have the option of having the credentials stored so that you do not need to enter them again. After that, you’ll have access to the directories which you can then mount as a drive or pin to Quick Access.
For OS X, connecting to the shares is a matter of using the Finder menu > Go > Connect to Server… You would then enter the IP address or hostname of your Home Assistant OS instance as `smb://your.ha.ip.address` or `smb://homeassistant` and enter your credentials when prompted.
---
### Installing and using the SSH add-on (requires enabling advanced mode for the HA user)
The Terminal & SSH add-on provides access over an SSH connection, and also includes nano and vi editors. It can be installed from the add-on store’s Official add-on repository after enabling advanced mode for your Home Assistant user’s profile. Additionally, this add-on provides access to the Home Assistant Command Line Interface (CLI) which provides custom commands for checking logs, stopping and starting Home Assistant and add-ons, creating/restoring backups, and more. (See [Home Assistant via Command Line](https://www.home-assistant.io/hassio/commandline/) for further info). The Terminal & SSH add-on does _not_ provide access to the underlying host file system.
To use the add-on, enter a password or public key on its configuration page, then save and start the add-on.
The Terminal & SSH add-on also provides a web terminal which allows you to access a terminal via the Home Assistant user interface. In order to access from an ssh client, a port needs to be entered in the network section of the add-on’s configuration page.
---
### Installing and using the Visual Studio Code (VSC) add-on
The Visual Studio Code add-on provides access through a feature packed web-based version of the Visual Studio Code editor and currently only supports AMD64 and aarch64/ARM64 machines. This add-on can be installed in the add-on store from the Community add-on repository. The add-on also provides access to the Home Assistant Command Line Interface (CLI) using VSC’s built in terminal, which allows for checking logs, stopping and starting Home Assistant and add-ons, creating/restoring backups, and more. (See [Home Assistant via Command Line](https://www.home-assistant.io/hassio/commandline/) for further info).
There is no configuration required for editing files within your `/config` directory. In order to enable access to other directories, it is necessary to edit the add-on’s configuration from its configuration tab. See the add-on documentation for details.
---
### Installing and using the File Editor add-on
A more basic and light weight alternative to Visual Studio Code, the File Editor add-on provides access through Hass-Configurator, which is a web-based filesystem-browser and text-editor. YAML files are automatically checked for syntax errors while editing. This add-on can be installed via the add-on store from the official add-on repository.
There is no configuration required for editing files within your `/config` directory. In order to enable access to further directories, editing the add-on configuration is required. See the add-on documentation for details.
## Backups
Backup of your Home Assistant and add-on data and configuration. They are stored in a compressed archive file (.tar). Backups are made from the Supervisor Backups panel. There is also a service available that allows you to trigger the creation of a backup from an automation. Backups are stored in the `/backup` directory.
A full backup includes the following directories:
- `config`
- `share`
- `addons` (only manually installed or created add-ons, not those installed from the store)
- `ssl`
- `media`
A partial backup consists of any number of the above default directories and installed add-ons.
### Making a Backup from the UI
1. Go to [Settings > System > Backups](https://my.home-assistant.io/redirect/supervisor_backups) in the UI.
2. Click the **Create backup** button in the lower right.
3. Provide a name for the backup.
4. Choose full or partial.
5. Choose to password protect or not. Password-protected backups cannot easily be browsed outside of Home Assistant OS.
6. Click “Create” to begin the backup.
### Restoring a Backup on a new install
You can make use of backup which you have copied off of a previous install to restore to a new installation during the onboarding process. Follow the link at the bottom of the account creation page to upload your backup from the previous installation.
For restoring a backup at any other time, visit the Supervisor backup panel in your UI and use the following steps:
1. Select “Upload Backup” from the icon in the upper right of the page.
2. Click on the folder icon to navigate to your backup .tar file and select it.
When the upload is completed, you will be presented with the backup restore dialog for restoring it, and can then choose to restore in full or in part by manually selecting individual items.
If the backup you are uploading is more than 1GB in size, it can be faster and more efficient to make use of the Samba add-on in order to transfer files to the `/backup` directory.
The length of time it takes to create or restore backup will depend on how much you have to compress or decompress.
If you’re looking to slim down your backup, check if your configuration directory contains a large database file (`home-assistant_v2.db`). See the [`recorder`](https://www.home-assistant.io/integrations/recorder/) integration page for options to keep your database data down to a size that won’t cause issues. Note the keep days, purge interval, and include/exclude options.
When the restore is complete, Home Assistant will restart to apply the new settings. You will lose the connection to the UI and it will return once the restart is completed.
### Creating backup using the Home Assistant Command Line Interface
1. `ha backups list` - lists backups and their slugnames
2. `ha backups restore slugname` - restores a specific backup
3. `ha backups new --name nameofbackup` - create a backup
Use `ha help` to get more information about the command line usage.
### Copying your backups to another location
You often need a backup in case your system has crashed. If you only store them on the crashed device, you won’t be able to access them easily. We recommend that you manually copy them from `/backup` to another machine on occasion. Or even better, create an automation to handle that, or make use of one of the following add-ons:
- [Google Drive Backup](https://github.com/sabeechen/hassio-google-drive-backup)
- [Dropbox Sync](https://github.com/danielwelch/hassio-dropbox-sync)
- [OneDrive Backup](https://github.com/lavinir/hassio-onedrive-backup)
- [Nextcloud Backup](https://github.com/Sebclem/hassio-nextcloud-backup)
- [Remote Backup (scp/rsync/rclone)](https://github.com/ikifar2012/remote-backup-addon)
- [Samba backup](https://github.com/thomasmauerer/hassio-addons/tree/master/samba-backup)
- [Syncthing](https://github.com/Poeschl/Hassio-Addons/tree/main/syncthing)
## Home Assistant via the command line
 Home Assistant upgrade process from the SSH command line
On the SSH command line, you can use the `ha` command to retrieve logs, check the details of connected hardware, and more.
### Home Assistant
```
ha core check
ha core info
ha core logs
ha core options
ha core rebuild
ha core restart
ha core start
ha core stats
ha core stop
ha core update
```
### Supervisor
```
ha supervisor info
ha supervisor logs
ha supervisor reload
ha supervisor update
```
### Host
```
ha host reboot
ha host shutdown
ha host update
```
### Hardware
```
ha hardware info
ha hardware audio
```
### Usage examples
To update Home Assistant to a specific version, use the command:
Replace x.y.z with the desired version like `--version 2023.4.6`
You can get a better description of the CLI capabilities by typing `ha help`:
## Lost Password and password reset
Please refer to the [I’m locked out!](https://www.home-assistant.io/docs/locked_out/#home-assistant-including-supervised) documentation page.
## Installing third-party add-ons
Home Assistant allows anyone to create add-on repositories to share their add-ons easily. To try this locally, you can use our example add-on repository at
Home Assistant cannot guarantee the quality or security of third-party add-ons. Use at your own risk.
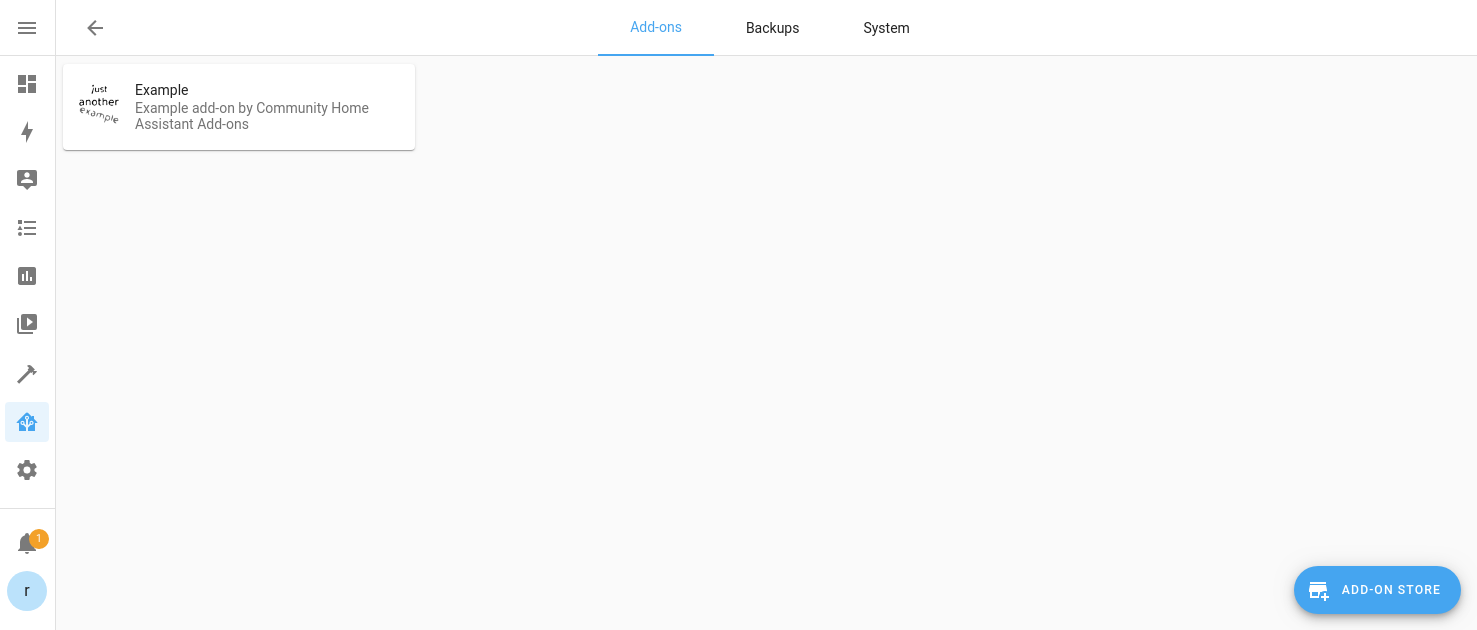 From [Settings > Add-ons](https://my.home-assistant.io/redirect/supervisor) open the add-on store.
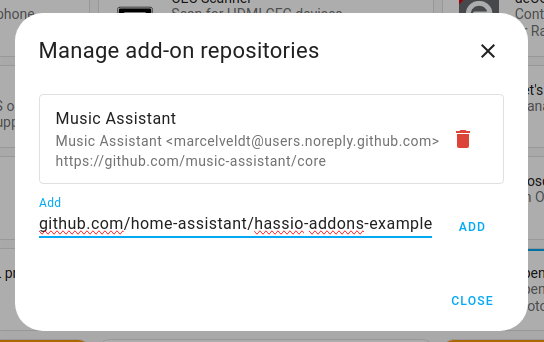 Add the URL of the repository and then press "Add". A new card for the repository will appear.
## Help: Repository is not showing up
If you have added a repository, but it’s not showing up, it means that the repository contains invalid configuration. Go to [Settings > System > Logs](https://my.home-assistant.io/redirect/logs) to find the System log. It should tell you what went wrong. Report this information to the repository author.
#### [**Help us to improve our documentation**](https://www.home-assistant.io/common-tasks/supervised/#feedback_section)
Suggest an edit to this page, or provide/view feedback for this page.